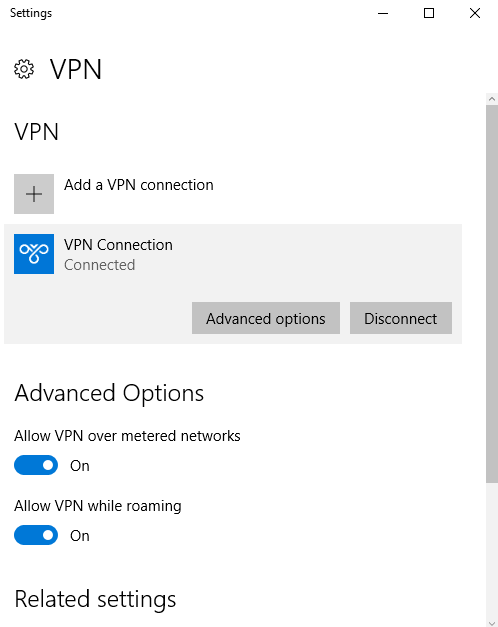
Using Cloud Middleman on Windows
How to install our root CA, install the device certificate, and connect to Cloud Middleman's VPN server
Windows configuration can be divided into 3 steps:
- Install the CA certificate. This is required for Windows to trust the SSL certificates that we issue. You'll only have to do this once per device.
- Install the Client Auth chain. Windows requires that VPN client authentication certificates have a fully-qualified chain, so you'll need to install this.
- Install the Device Certificate. The VPN connection uses machine certificate authentication, so you'll need a certificate installed.
- Configure the VPN. In order to log traffic, Cloud Middleman requires a connection to our VPN server.
(These directions target Windows 10 specifically, but users of Windows 7 and up should be able to follow along as well.)
Install the CA Certificate
Cloud Middleman requires you to install a CA certificate to allow us to intercept your https traffic. If your device has a limited domain whitelist configured, we will generate a special CA that is valid for only these domains; otherwise, we'll provide you with a link to our global CA certificate.
Step 1: Download the provided CA Certificate. It should have a .crt extension.
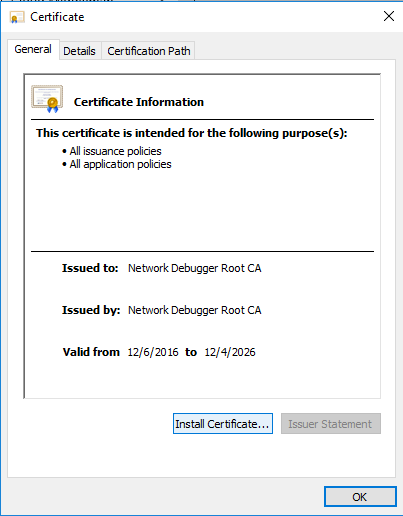
Step 2: Open the file from windows explorer (or from your browser). You should see a dialog like the following. Click the "Install Certificate" button.
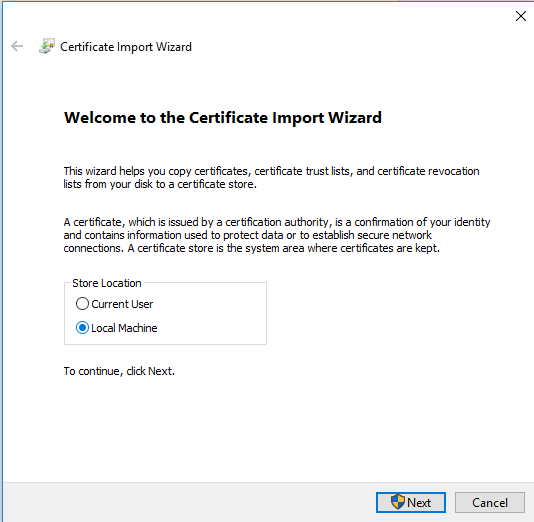
Step 3: Import the certificate into the Local Machine store, as in the screenshot below:
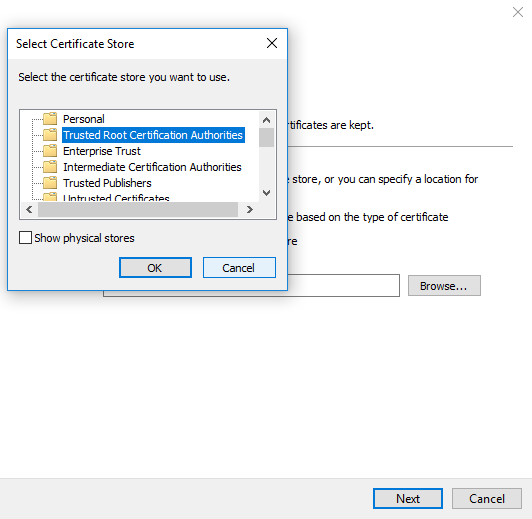
Step 4: Make sure to install the CA certificate into your "Trusted Root Certification Authorities" store.
You have now installed our CA certificate.
Install the Client Auth Certificate Chain
Step 1: From the device invitation screen, download the Cloud Middleman VPN Certificate bundle.
Step 2: Open the certificate file (file extension .p12 ). Windows should present you with a certificate installation wizard. Choose Local Machine as the destination store.

Step 3: Follow the directions of the wizard, leaving the certificate password field blank when prompted. Leave all other settings as their defaults and complete the wizard.
Install the Device Certificate
Step 1: From the device invitation screen, download your device certificate by clicking the button. This is also a good time to copy the password.
Step 2: Open the certificate file (file extension .p12) . Windows should present you with a certificate installation wizard. Again, choose Local Machine as the destination store (it will not be found by the VPN configuration otherwise).

Step 3: Follow the directions of the wizard, entering the certificate password when prompted. Leave all other settings as their defaults and complete the wizard.
Configure the VPN
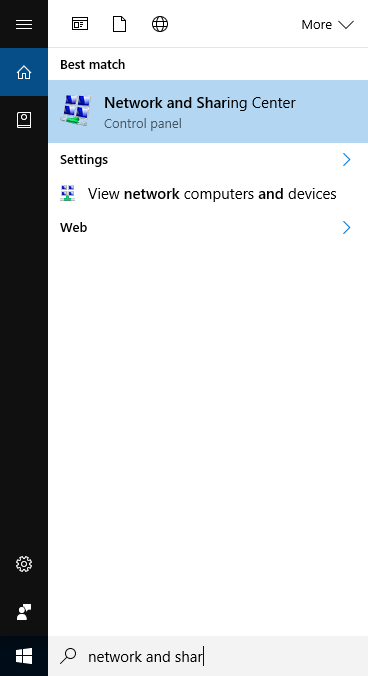
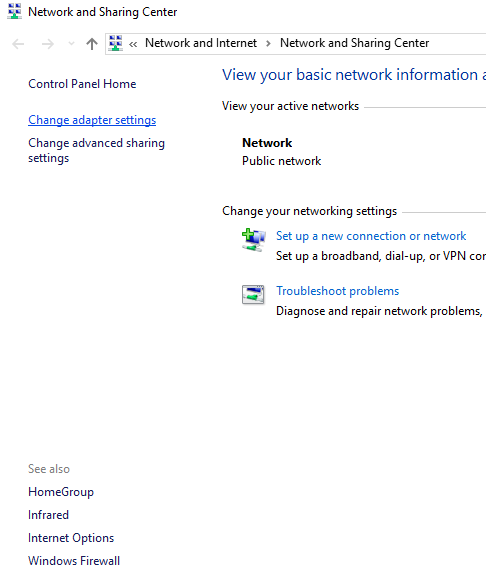
Step 1: Navigate to the Network and Sharing Center. The easiest way to do this is to search for it from the start menu:
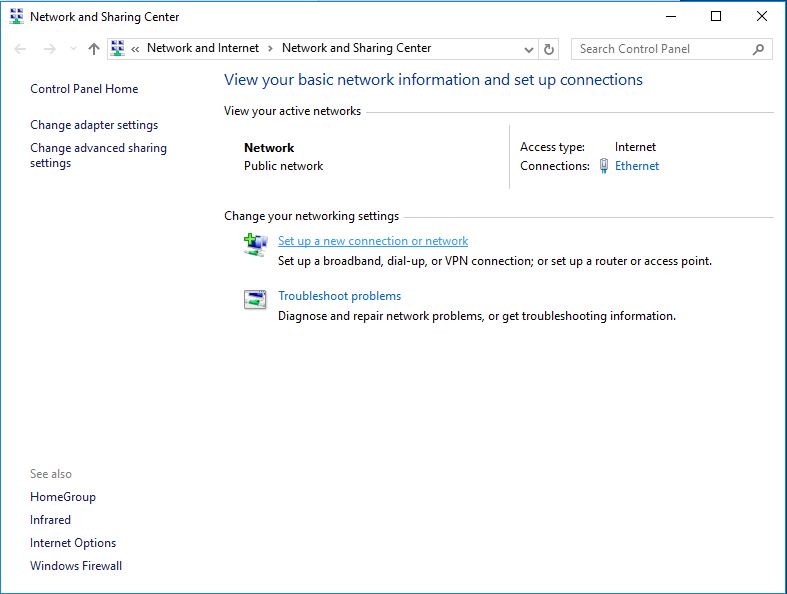
Step 2: Click on "Set up a new connection or network".
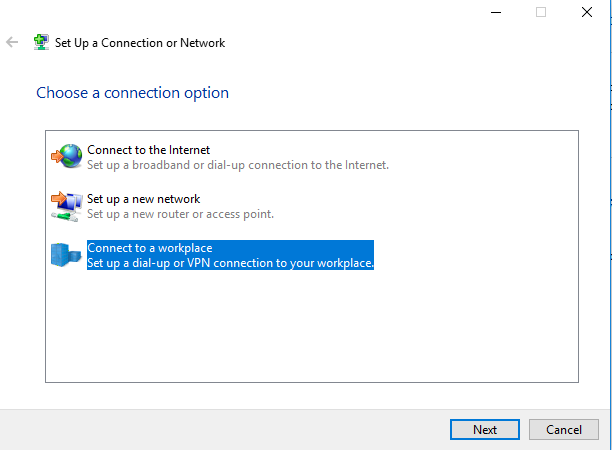
Step 3: Select "Connect to a workplace" and click Next.
Step 4: Select "Use my Internet connection (VPN)" and click Next
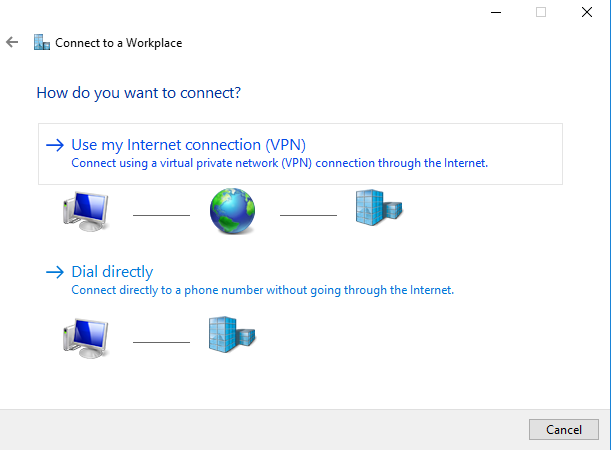
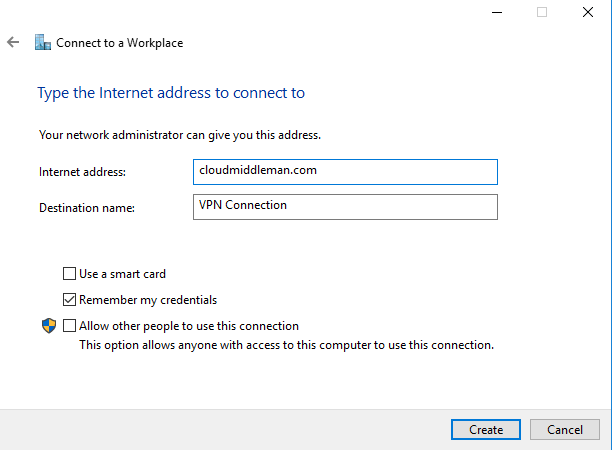
Step 5: Enter cloudmiddleman.com as the Internet address. You can use whatever you like as the destination name. Click Next.
Step 6: Back at the Network and Sharing Center, click on "Change adapter settings" in the left menu.
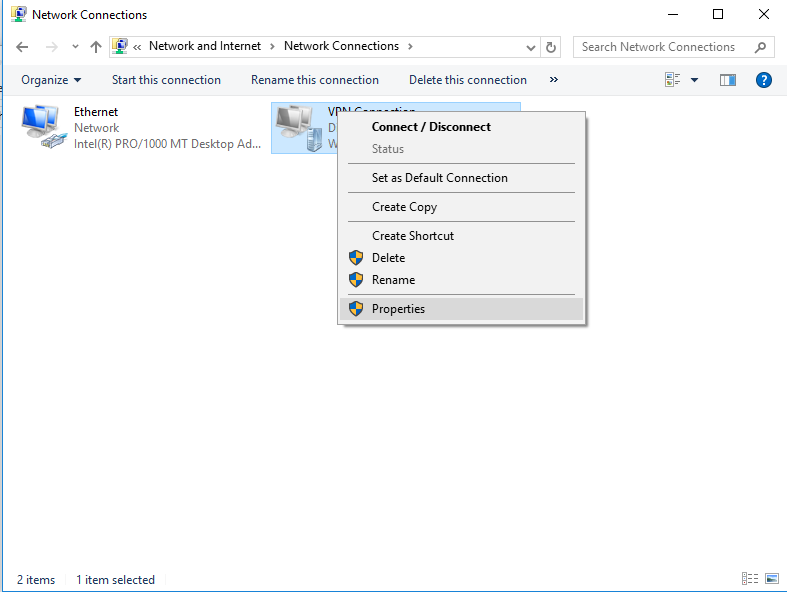
Step 7: Right-click on your newly-created VPN Connection and choose "Properties".
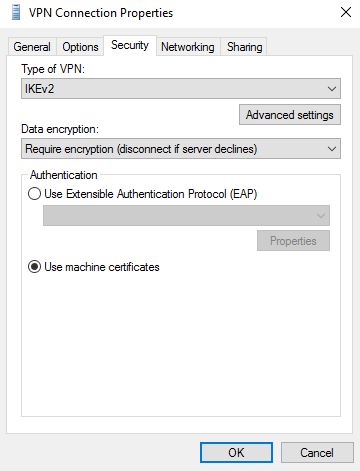
Step 8: Under the "Security" tab, make the following changes:
- Choose "IKEv2" as the VPN type
- Choose "Require encryption (disconnect if server declines)" from the Data Encryption dropdown
- Choose "Use machine certificates" as the Authentication method
You should now be able to connect to the VPN. Make sure you remember to confirm your connectionhttp://cloudmiddleman.com/docs/completing-your-vpn-connection! If an error occurs, double-check the above steps, then proceed to the Troubleshooting Guide.
